Friday, November 1, 2013

Destroying Sensitive Documents, the Green Way

After 1 month in the worm compost bin, the
few raggled receipts that remain are illegible
If you're like me, you're wary of throwing away or recycling paperwork and receipts that contain sensitive information.  I used to hoard my old documents until I had a large, lopsided stack that had eaten half of my desk.  Then I would have to find a shredder or a place to burn them.  I was actually saving up money to buy myself a paper shredder, before I had a stroke of genius.  Compost!

Traditional composting can be somewhat time consuming and expensive.  If you're an apartment dweller like I am, composting the old fashioned way just isn't possible.  My compost solution has been to convert a couple rubbermaid bins into a worm compost system.

As of this month, my system has been in place for a whole year.  I haven't had any problems with bad smells, bugs, or mess.  The population of worms has exploded, and I've had two harvests of black gold (aka vermicompost).  To learn more about the benefits of vermicompost and how to make a worm compost bin like mine, read my earlier post "Clean, Simple and Inexpensive Composter -- A Rare Combination of Words".

Composting your sensitive documents is a breeze -- especially if you use a worm compost system.  Just lay your papers along the top of the compost bin, beneath a layer of newspaper or cardboard.  You can rip up the papers a little if you want, but if you have an active worm community it's not really necessary.  If your compost is a bit dry, moisten the paper with a spray water bottle.  Close the lid and let the worms work their magic.  In a few short weeks, your worms will have eaten up your paperwork and converted it into rich, nutritious compost.

Whenever I'm doing a gardening workshop, I joke around that compost is the solution to everything.  As time goes by, it becomes less of a joke and more of a reality.

1. Make a worm compost bin.  Click here for instructions.


2. Place receipts and sensitive documents on top of vermicompost.  Moisten with spray water bottle and rip up a bit if you think it's really necessary.


3. Cover with layer of moist newspaper or cardboard.


3. Let the worms work their magic.  1 month later, many of the receipts are gone.  The remains are shredded and illegible.


If you have any questions, comments, ideas or suggestions, please feel welcome to leave a comment on this post or shoot me an email.

What is another "outside the box" use of compost?  

What's your experience with traditional or worm composting?  Do you have any tips or fun stories?

Wednesday, July 3, 2013

Mini Aquaponics -- Small in Size and Expense

This small and simple mini aquaponic
system is the perfect size for classrooms,
offices, or a sunny windowsill at home.
What I love about aquaponic systems is the versatility there is.  Really all you need for a successful system is water, plants, fish, oxygen (and maybe some worms).  This allows for creativity and flexability in construction.  Some systems are massive and produce as much food as a farm.  This system is little.  It's the perfect size to use as a demonstration of the concept of aquaponics.

A smaller aquaponic system works well near a sunny classroom window.  Students can use the system for experiments, and they can learn a lot about concepts like botany, symbiosis, the water cycle, the nitrogen cycle, and technology.  Aside from using the system to meet state and common core standards in lessons, the presence of plants indoors has been shown to increase productivity and reduce stress.  Having live plants in the classroom would benefit the students and the teachers.

Not a teacher?  Not a problem.  An aquaponic system is like a living piece of art.  It can beautify your workplace or residence, and stimulate conversation with coworkers and visitors.

What is an aquaponic system?

Plants are grown hydroponically without soil.  Instead of adding fertilizer for the plants, fish live in the water reservoir for the plants.  Through the power of the nitrogen cycle, when fish release waste into the water, they supply nutrients for the plants.  In return, the plants keep the water clean for the fish.

To build this mini aquaponic system, you'll need:

Depending on the scale of your new mini-aquaponic system, your components should come to somewhere between $15 and $30.
Putting it all together

Day 1

Start by rinsing out the aquarium, gravel, and small container with clean water.  Put a layer of gravel on
Oxygen is important for a successful aquaponic system.
Add a pot or jar to protect your betta fish from the current.
 bottom of the aquarium, and add water.  Place the small container on the gravel in the aquarium.  This will provide a place for your betta fish to rest without getting pulled into the current of the air pump.

In the corner of the aquarium lid, there will be a little circle in the grating.  Use a nail to open that hole.  Put together your air pump, stone, check valve and connective tubing as per the manufacturer's instructions.  Run the connective tubing through the new hole in the aquarium lid.  This will hold your air stone in place.  Turn on the air pump.  You should see bubbles come out of the air stone.

Allow the water to cycle for 24 hours before adding the fish.  This should allow the chlorine in the tap water to evaporate.  If you are using water from a rain barrel, you don't need to wait before moving to the next step.

Day 2

Add the betta fish to the aquarium.  If you have worms, you can add them to the aquarium at this time.  They will tunnel in the gravel and consume the solid fish waste.  Don't be alarmed if your fish eats one or two worms while you're adding them to the aquarium.

Remove the plastic cover from the aquarium lid.  If you are using a strawberry basket, put it through the opening in the lid to make sure that it fits snugly.  If you are using a foam egg carton, use scissors to cut the carton to fit snugly in the opening.  Use scissors to punch small holes in the bottom of each section of the egg carton.  The basket or carton should touch the water of the aquarium, but should not fall in through the opening.

Add plants to the basket or carton.  Pull some of the roots out through the openings in the bottom of the basket or carton.  Add gravel around the plant in the basket or carton.  Check to make sure each plant's crown is not covered by the gravel.  Adjust as needed.

Place your planter snugly in the lid.  Check to make sure the bottom of the planter or the plant roots are touching the water.

Ongoing Maintenance

To feed the fish, you can pull up the side of the lid that does not have the air pump, or you can remove the planter and add food through the opening.  Add water to the aquarium as needed.  Replace dead plants as necessary (it may take a few tries to get a plant to thrive).

In conclusion...

Again, if aquaponics are anything, they are versatile.  If this system doesn't work exactly right for you, make modifications.  

Trial and error are an important part of
creativity.  I went through a bit of failure
before finding a system that worked.
For example, one of my good friends is a school teacher.  She attended one of our "Gardening in the Classroom" sessions where we showed teachers how to build one of these mini systems.  She already had an aquarium in her classroom and wanted to add plants without having to build a new, separate system.  She used a foam egg carton planter, but found that the planter was too small to fit snugly in the top of her aquarium.  So she used pipe cleaners to secure her planter to the edge of her aquarium.  What a great idea!

The idea for this mini aquaponics system spitballed after I built my Bare-Bones Aquaponic System late last year.  We built the bare bones system at the Hazlewood ECO Center at Paris Landing State Park and the "Every Child Outdoors" Youth Vegetable Garden at the Knoxville Botanical Garden and Arboretum.  My boss and I came up with the idea to take that, make it smaller, less expensive, and easier to build.  Before Wendy's strawberry basket revelation, I absolutely destroyed an aquarium lid by trying to drill holes in it with a hole saw.  Then I got this idea to build a plywood piece that would fit on the hole in the aquarium lid.  That worked, but it was too much work.  In this case, simpler is better -- much, much better.

So feel free to get creative with this project.  Then, please check in and share what you've done.

To see more photos of building a raised bed garden, check out my flikr set.

If you have any questions, comments, ideas or suggestions, please leave a comment or shoot me an email.

What is your experience (victories or pitfalls) with aquaponics?  What would you try growing if you had this mini aquaponic system?


Thursday, May 16, 2013

Build Your Own Raised Garden

There are so many different ways to grow a garden, from traditional furrow beds, to window boxes and everything in between.  My absolute favorite way to grow annual veggies is in a raised bed planter.

A very manageable size raised vegetable bed at
Austin-East High School
What is a raised garden bed?
Raised bed gardening is easier on my knees and back because I don't need to bend over nearly as far to plant, weed, water, or harvest.  There's also typically less weeding in a raised bed situation because it is difficult for creeping weeds to sneak into the garden from the sides.

There's more than one way to build a raised garden, and a variety of raised bed kits are available online or through local garden centers.  However, kits can be expensive and some may even be more difficult to assemble than constructing your own.  It can be difficult for home gardeners to choose a style or to decide whether to buy a kit or design and build themselves.  For this reason, some people never make it past the planning stage stage.

If this is the year that you're finally going to build a raised garden, then I suggest starting with this very simple and inexpensive plan.  All you really need is some lumber, posts, and soil to get started.  Sounds easy, right?

To build a raised garden, you'll need:

  • Posts.  I suggest:
    • Four 4 inch x 4 inch x 2 foot posts.  
    • The posts will help secure the bed in the soil.  It's really not necessary to go deeper than 1 foot into the ground.  Even just 6 inches may be sufficient.  Modify as you see fit.
  • Sides.  I suggest:
    • Four 2 inch x 6 inch x 3 foot sections of lumber
    • Four 2 inch x 6 inch x 5 foot sections of lumber
    • I prefer rectangular beds to square beds because it's easier to reach the center of the bed.  If you have to climb into your raised bed to work (as is the case for many square beds greater than 4 feet long), that kind of defeats the purpose.
    • Feel free to modify the length, width, and height of your bed as you see fit.  To change height of your bed, consider using 2x4s or 2x10s instead of 2x6s as I have.
    • If you're not comfortable with cutting your own lumber, most box stores will cut your lumber order for you at a very minimal cost.
    • Laying out lumber before building can help you picture
      what the garden bed will look like after construction
    • Traditionally, pressure treated wood has been avoided because it would leach arsenic into the soil.  Today, arsenic is no longer used to treat most lumber.  Instead, pressure treated wood contains copper, which has some fungicidal properties for plants and should have a minimal affect on the garden.  However, any sort of pressure treated wood is not recommended for organic gardening.  For more information about using pressure treated wood in the garden, "Are Pressure Treated Woods Safe in Garden Beds?" is a helpful article.
  • Soil
    • 15 cubic feet of topsoil, or a volume appropriate to your bed.  To find the amount of soil you'll need, multiply the width of the bed with the length and height of the bed (ex. 3 ft x 5 ft x 1 ft = 15 cubic feet).
    • Less than 30 cubic feet of soil can be conveniently purchased in bags from your local garden center or box store.  If a larger amount of topsoil is needed, consider ordering by the truck instead of bags.
  • Tools
    • 2.5 inch galvanized deck screws and power drill OR
    • 3 inch galvanized nails and hammer
    • I prefer screws to nails in a raised bed situation, but either method is acceptable.
    • Flat edge shovel
    • Post hole digger or a shovel
Building your raised garden

I prefer only put one nail or screw in a board
at first, so that I can move the lumber a bit
if I need to make adjustments.
Lay your lumber on the ground where you would like to build your raised bed.  Step back and visualize what the garden will look like once it's constructed.  Will your garden get enough sunlight?  Most vegetable plants will need six or more hours of direct sunlight a day.  How far away is the closest water source?  Are you on a slope?

When you have decided on a final location, mark the corners of where your bed will go.  Before construction, the grass or other plants that are already on the site will need to be killed or removed.  For smaller beds, it will be relatively easy to remove weeds with a flat edge shovel.  You should be able to scrape up the plants (roots and all), leaving bare soil.  Killing the weeds is an alternative to removing them mechanically.  The weeds can be killed with horticultural vinegar, a broad spectrum herbicide, or even boiling water.

Once your bed is clean of existing plants, it's time to dig your post holes.  If you don't have a post hole digger, a shovel will do.  

Construction is pretty simple -- put the posts in the holes, and nail on the sides.  This method can be a little bit sloppy; so I prefer putting the bed together in phases.  First, build the ends of the bed.  Nail or screw the two shorter boards to the posts for each side.  It helps to just add one screw or nail at first, so the boards will be a little moveable.  This way you have a little wiggle room if the bed needs to be adjusted a bit.
I prefer to build the ends of the bed first


Place the end of the bed in the post holes.  Are the ends straight?  Are the holes deep enough?  Make any necessary adjustments, then attach the sides of the bed.  Go back and add the second screw or nail to each board so your garden bed will be more sturdy.

Once the bed is built, fill soil back around the posts and press firmly.  Add topsoil, plants, mulch and voila!  You have successfully completed your raised bed garden!

To see more photos of building a raised bed garden, check out my photobucket story.

If you have any questions, comments, ideas, or suggestions, I love to get email!

What are your experiences with raised bed gardening?  What is your favorite pre-fab kit?  What is your favorite raised bed style?


We have 18 raised beds at the Knoxville Botanical Garden & Arboretum's "Every Child Outdoors" Youth Garden.


This clip includes video of volunteers building raised garden beds beds at the Knoxville Botanical Garden & Arboretum's "Every Child Outdoors" Youth Vegetable Garden.

Friday, January 11, 2013

Xeric Terrariums, How to Create a Desert in Glass

What is a xeric terrarium?
Building a terrarium is a fun and inexpensive
way to garden.  Create a living centerpiece.
A terrarium is like a miniature greenhouse, where plant
specimens grow inside a glass container.  Really any kind of clear glass container can be turned into a terrarium.  You can purchase a vase or fish bowl, or repurpose a bottle or jar from your recycling bin.  Probably the most fun thing about building terrariums is the idea that there are endless possibilities, and creativity and imagination are the only limiting factors.

Xeric refers to an environment that has very little moisture.  Plants that are native to the Mediterranean region or the American Southwest would be considered xeric plants.  Cacti and 
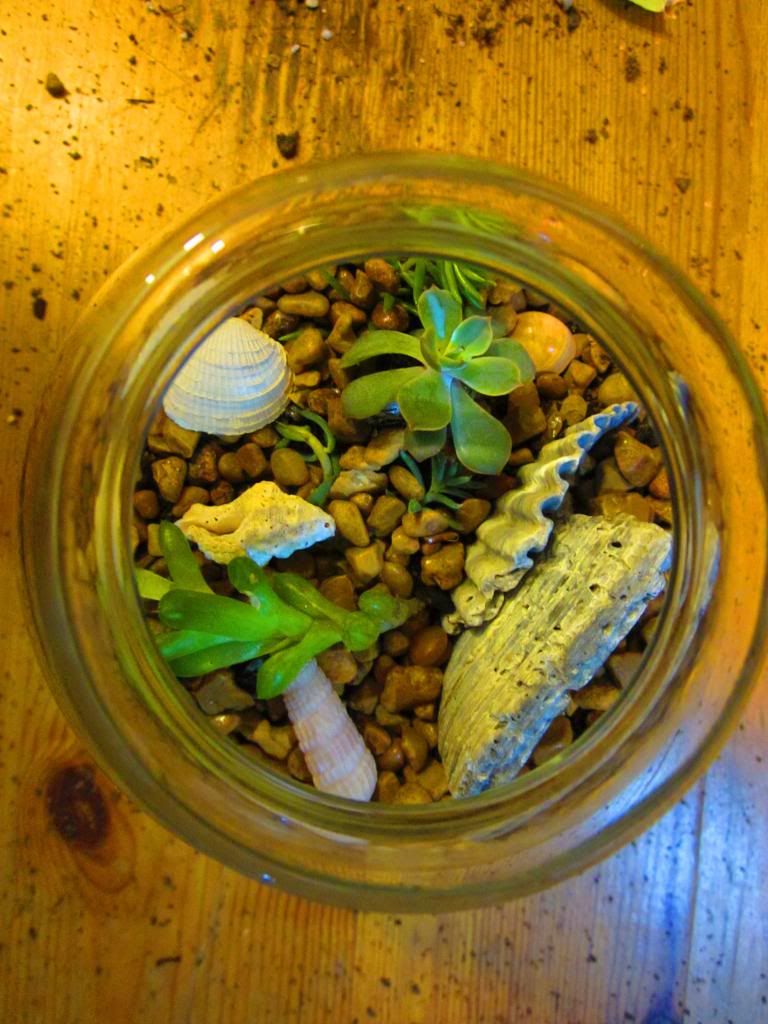
succulents are xeric plants that store water in their fleshy leaves and stems.  In terrarium gardening, xeric plants are best suited to life in an open container.  Terrariums that don't have an opening for air build up too much moisture for xeric plants to thrive in.  This means if you plan on creating a terrarium from a bottle or jar, plan on leaving the lid off so that humidity won't build up.

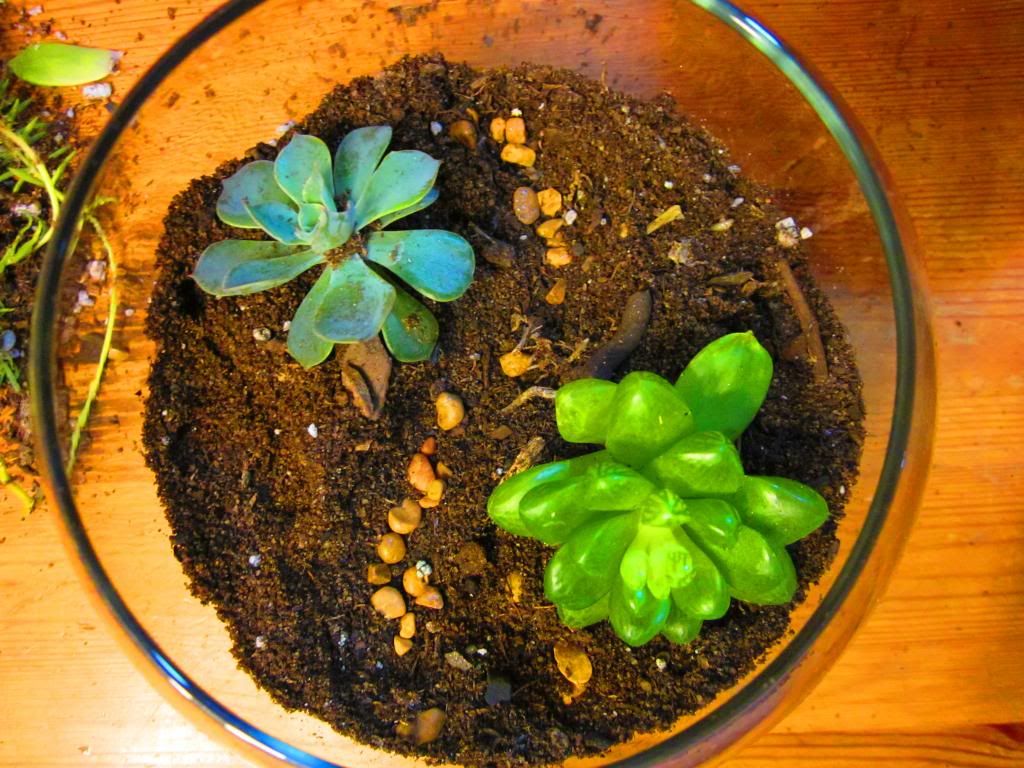
Terrariums make a great living centerpiece.  Building a terrarium can be a fun and inexpensive project for rainy days.  Even children that may not connect with traditional gardening can get excited about making a terrarium.

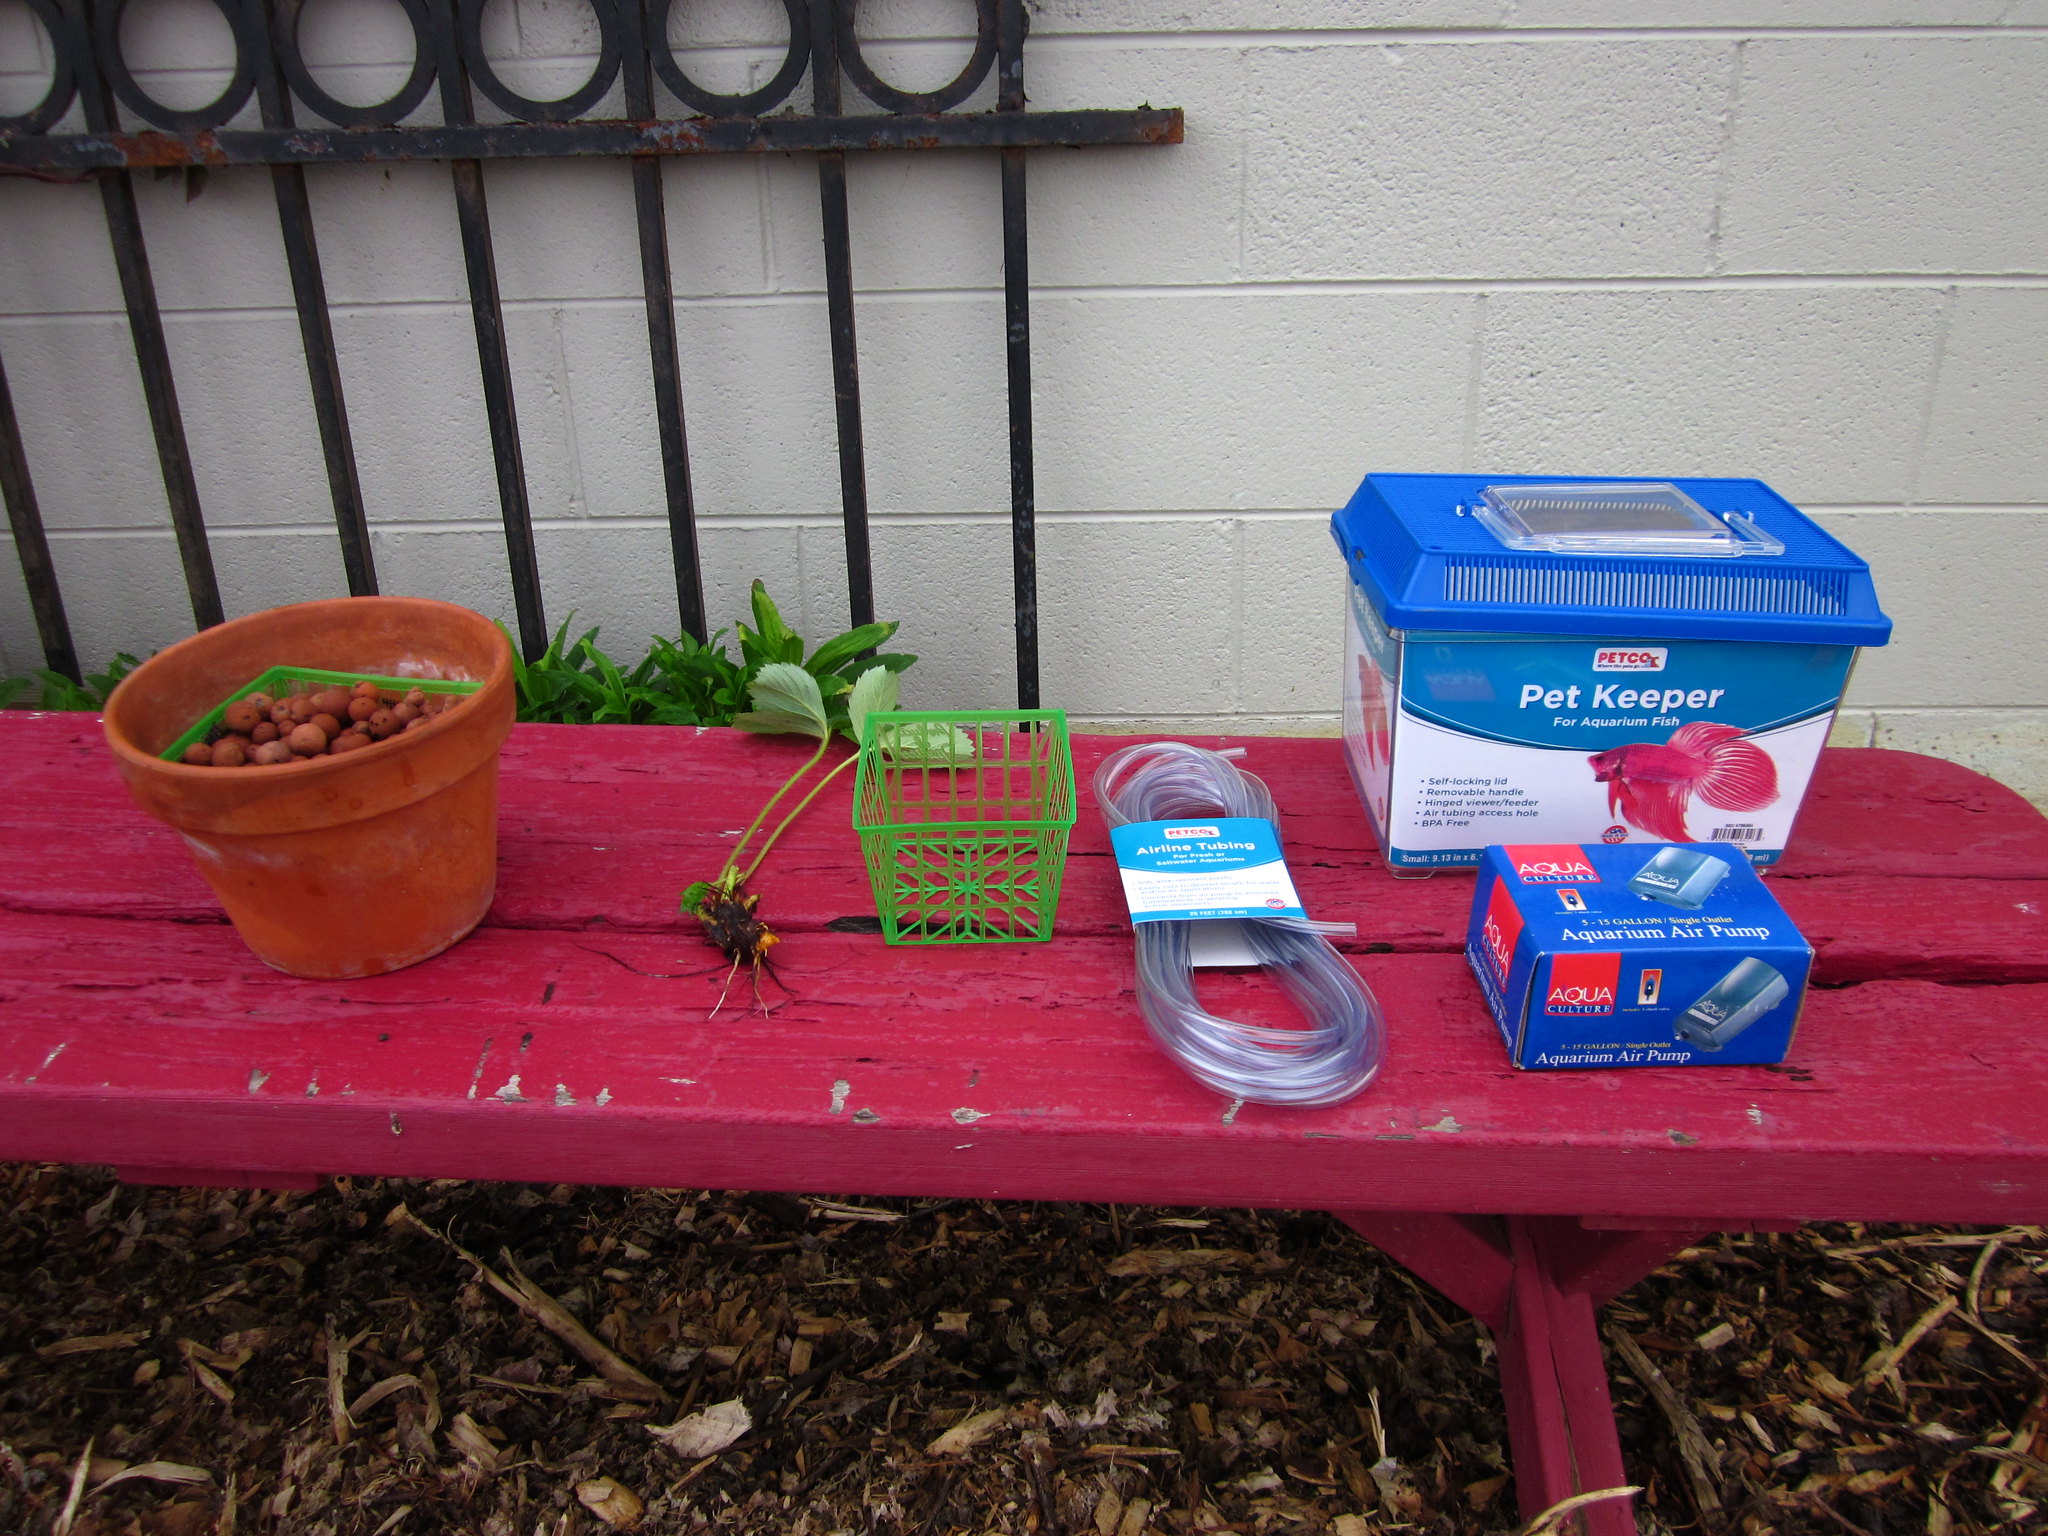
To create a xeric terrarium, you'll need

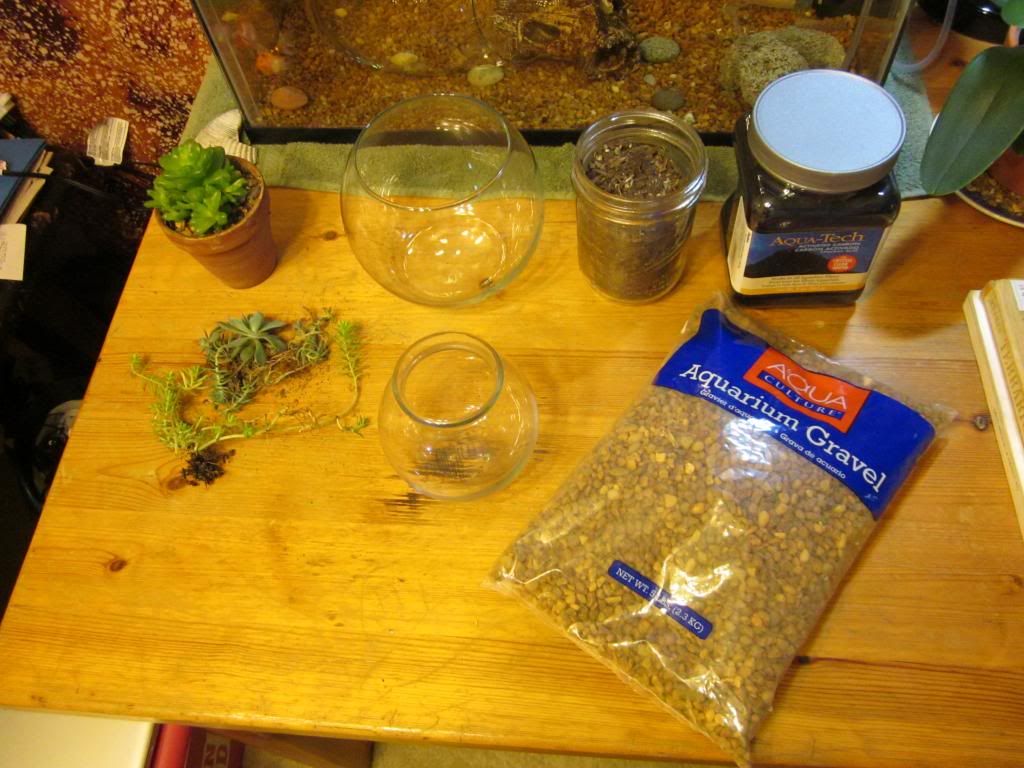
All that you'll need to create a xeric terrarium.
  • Something made of clear glass with an opening at the top, like a
    • Goldfish bowl
    • Mason jar
    • Soda bottle
    • Wine glass
  • Aquarium gravel - $3.74 Wal-Mart
  • Activated charcoal 
    • $6.74 Wal-Mart
    • I've read that charcoal from a fireplace will work as well
  • Sandy soil
    • $4.24 Home Depot
    • Mix your own, 1/4 - 3/4 sand
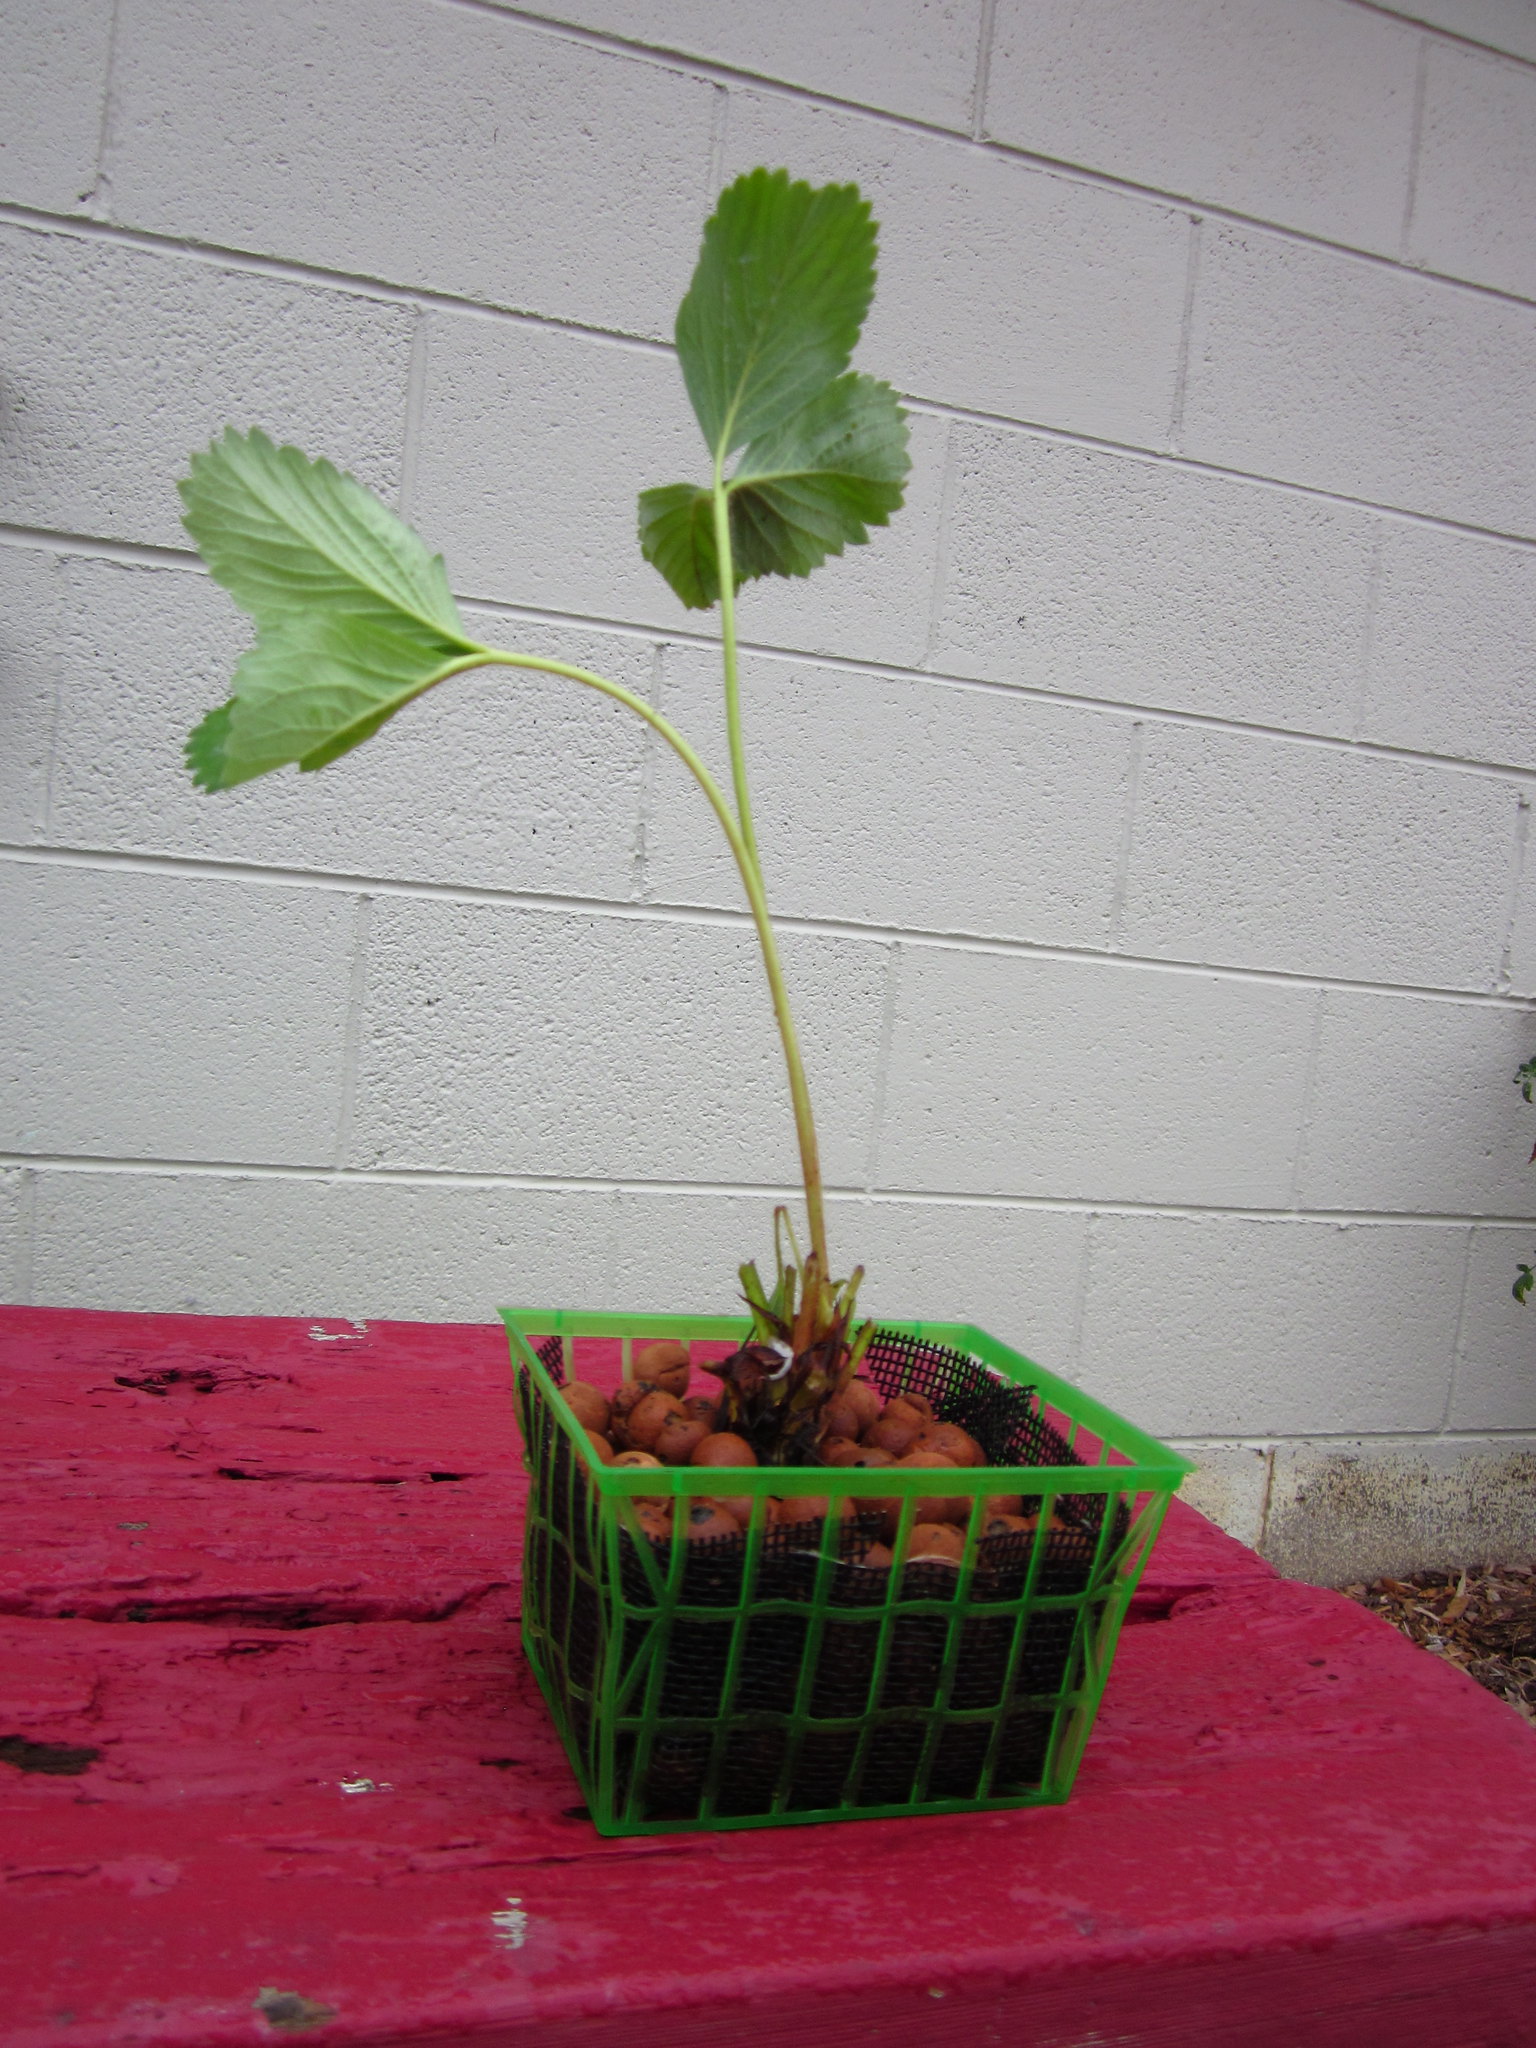
  • Cacti and succulent plants
    • You can purchase these for relatively little money from any nursery, box store, or grocery store.
    • Succulents are easy to propagate by breaking off a leaf or stem.  They'll develop roots after planting in the terrarium.
  • Decorations
    • Rocks
    • Seashells
    • Coins
    • Colored sand
    • Figurines
Other tools that may come in handy include

Putting it all together

Sketch out what you'd like your finished terrarium to look like.  Where do you want decorations?  Where do you want your plants to grow?  Keep in mind the size, color, and texture of elements you'll be using when drawing your design.

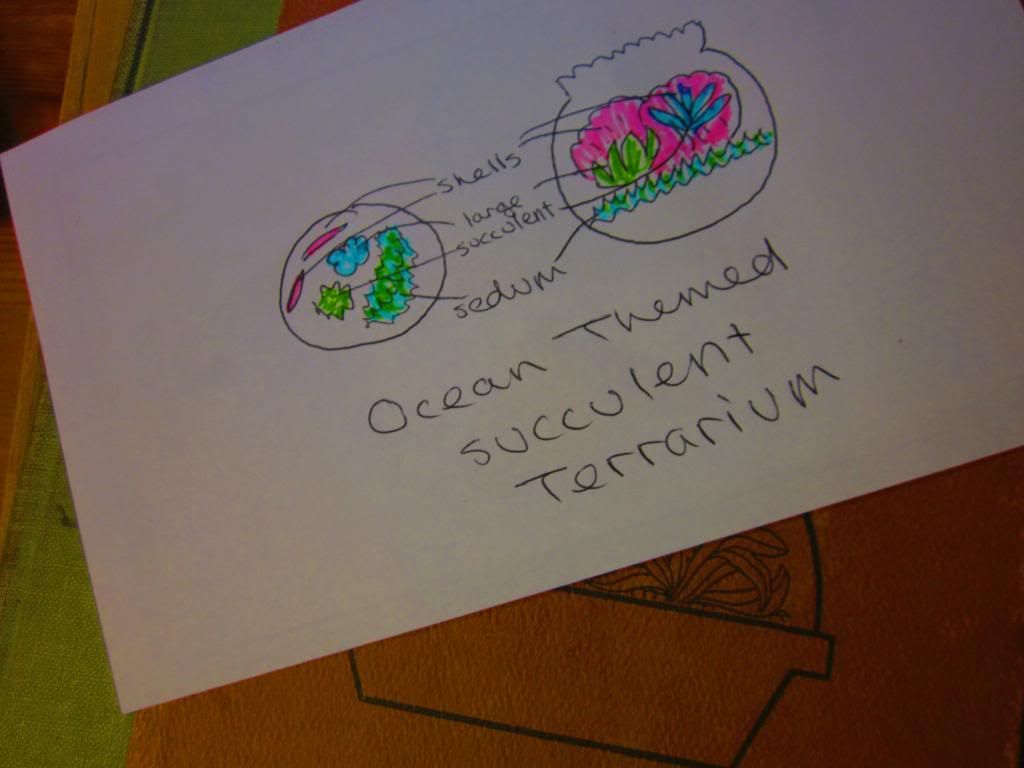
Take some time to plan before you plant.
Clean the glass of the container that will become your terrarium.  If you're repurposing an old jar or bottle, make sure it's free of any food and drink residue.  If the glass is already pretty clean, wipe off dust and fingerprints with a moist rag.

Add gravel to the bottom of the terrarium.  The amount of gravel you add depends on the size of the container.  Shoot for anywhere between 1/4 inch to 1 inch.  If the container has a small opening, a funnel may come in handy.  Gravel is essential to a xeric terrarium, because unlike planter pots, your container probably won't have holes in the bottom to drain excess water.  The bottom layer of gravel will allow water to collect below plant roots, hopefully preventing root rot.  Remember, cacti and succulents that are native to dry areas don't like "wet feet."

Shake some activated charcoal onto the gravel and mix.  Again, the amount of charcoal you add varies by the size of the terrarium.  Shoot for 1 teaspoon - 1 tablespoon.  Charcoal will help absorb odors and prevent mold and bacteria from growing.  Some older sources on terrarium gardening say that it's possible to use charcoal from a fireplace.  If using fireplace charcoal, be sure to crush well before using.  (If you've done this before, please leave a comment about your experience.)

Add your sandy soil mixture.  Shoot for 1/2 inch to 2 inches of soil.  It helped me to spread a thin layer of soil, add plants, then add more soil instead of trying to dig holes in a tiny glass jar.

Add large plants first, then smaller specimens.
Add plants.  Keep in mind that given time plants do grow, and space accordingly.  If the container is difficult to get in to for maintenance, consider adding fewer plants.  Succulents can grow very easily by breaking off a leaf or stem.  For example, if you only have one pot of a particular succulent, and you want to grow it in multiple terrariums, you can divide the plant or break off leaf or stem sections to plant in your new terrarium.  If your container has a small opening, tongs, tweezers, chopsticks or a pencil may come in handy to place the plants.

Add sufficient soil to cover the plant roots, then cover with gravel.  The top layer of gravel really gives a finished look that soil alone does not.

Add decorations.  Depending on what materials you're using for decor, you may want to place before planting.  I prefer to visualize where they'll be placed while planting and add afterwards.

Water the plants.  Be careful not to over-water because there's no drainage holes.  If you have a spray bottle, mist thoroughly.

Place your terrarium in a sunny location that isn't in direct light.  That means, the best spot for your terrarium is on a table near a sunny window.  With a little love, attention, and time, you'll have a beautiful living centerpiece.

To see more of my terrarium photos, check out my photobucket story.

If you have any questions, comments, ideas, or suggestions, I love to get email!

What are some experiences from when you built a terrarium?  What are things you did well?  What are some things you wish you'd done differently?
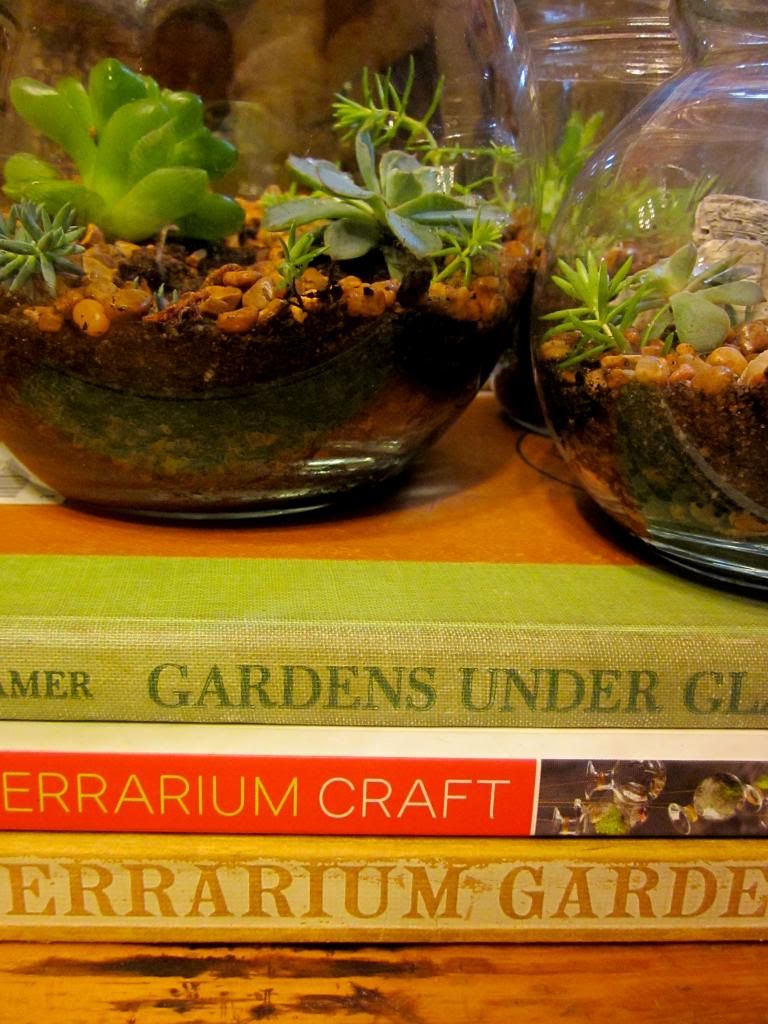
Sources:
Aiello, Amy Bryant, Bryant, Kate.  Terrarium Craft: Create 50 Magical, Miniature Worlds.
Kramer, Jack.  Gardens Under Glass: The Miniature Greenhouse in Bottle, Bowl, or Dish.
Kramer, Jack.  The Complete Book of Terrarium Gardening.
Wang, Peggy.  "21 Simple Ideas for Adorable DIY Terrariums."  Buzzfeed.com.